D5 RENDER XR Workflow
Master the process of creating immersive 3D XR experiences with our streamlined workflow.
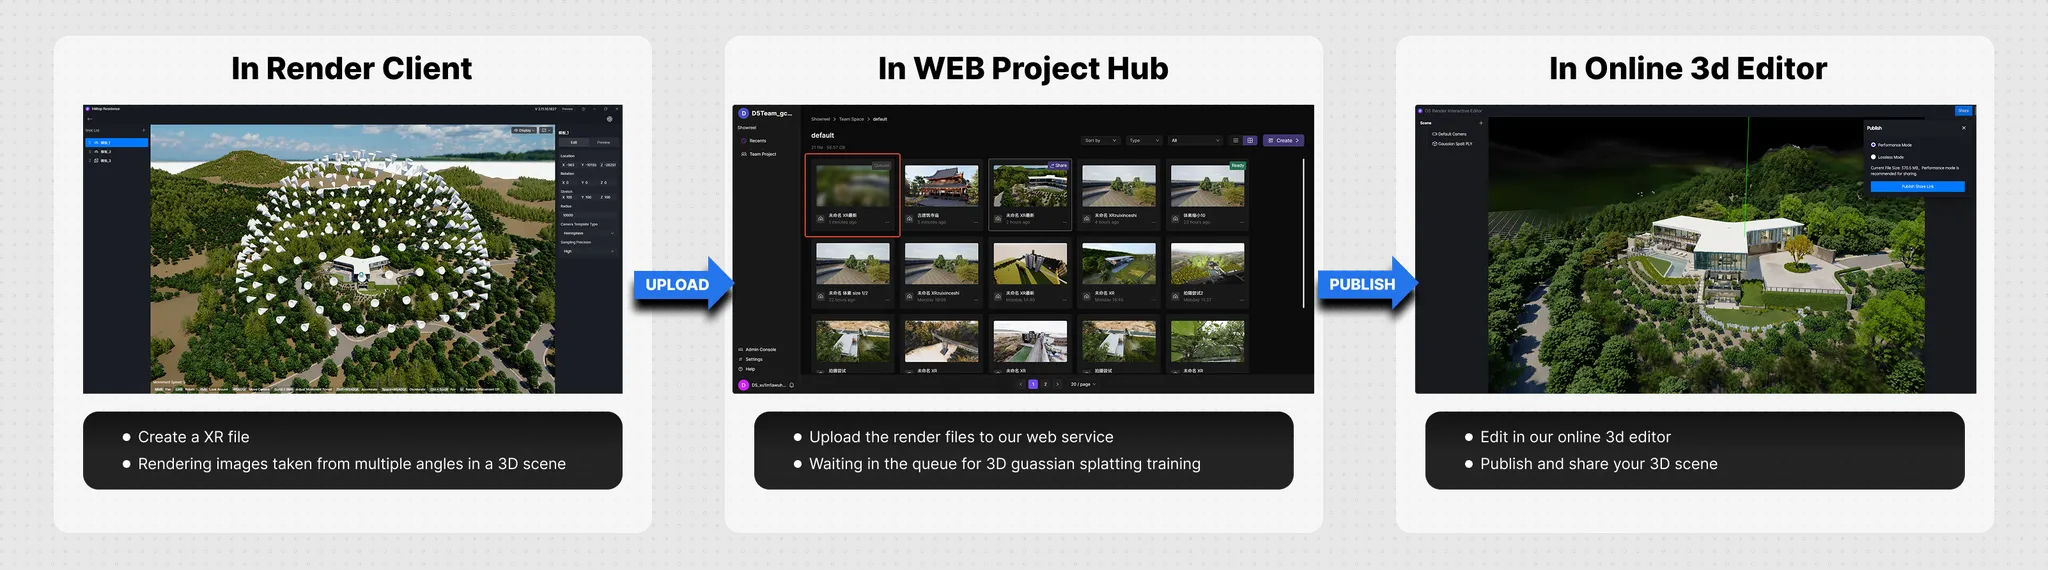
What's D5 RENDER XR?
D5 RENDER XR is a new way of displaying rendering results that combines 3d rendering technology and 3d guassian splatting technology, allowing users to use renderers to render images of multiple angles of an object (or scene) in batches, and then publish these training data to the cloud. Through the AI training of the 3d guassian splatting training service deployed on the server, a 3d web link (file format is .ply or .splat) that can be shared online is finally obtained.
Create XR Tour Projects
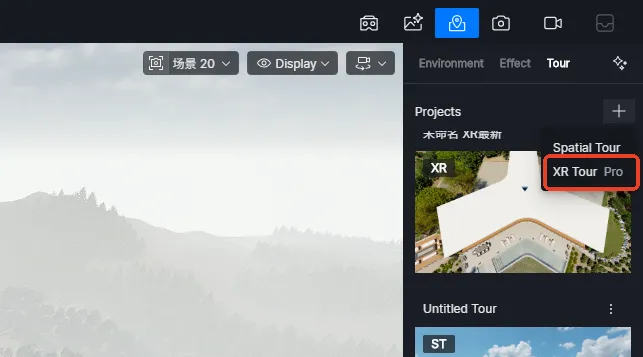
Select TOUR/XR TOUR in the upper right corner to create an XR TOUR project file. The XR TOUR project file will store the settings of the shooting template and the storage location information.

In the XR project, click the upper right corner of the left panel to select a template, and then click a shooting position in the scene to initialize the template.
After initializing the template position, you can use gizmos to adjust the position and angle of the template, use the "parameter panel" to adjust the size, use the "preview" to view the final shooting effect, and make secondary adjustments. The final rendered result is consistent with the "preview".
There are some limitations to using only one template. For example, a single template cannot capture both close-up and distant views of an object at the same time. Therefore, multiple templates can be added to improve coverage and capture more detail in the shooting scene.
After editing the shooting template, tick the template to be rendered in the render window, click Render and wait for the rendering to end.
Upon completion of rendering, all local files will be stored at the user-specified path, and a local HTML file will be generated for result viewing. For enterprises or devices with strict data security restrictions that prohibit data uploads, the entire set of local files can be copied offline to facilitate multi-angle presentation of the design.
Publish to MySpace Cloud
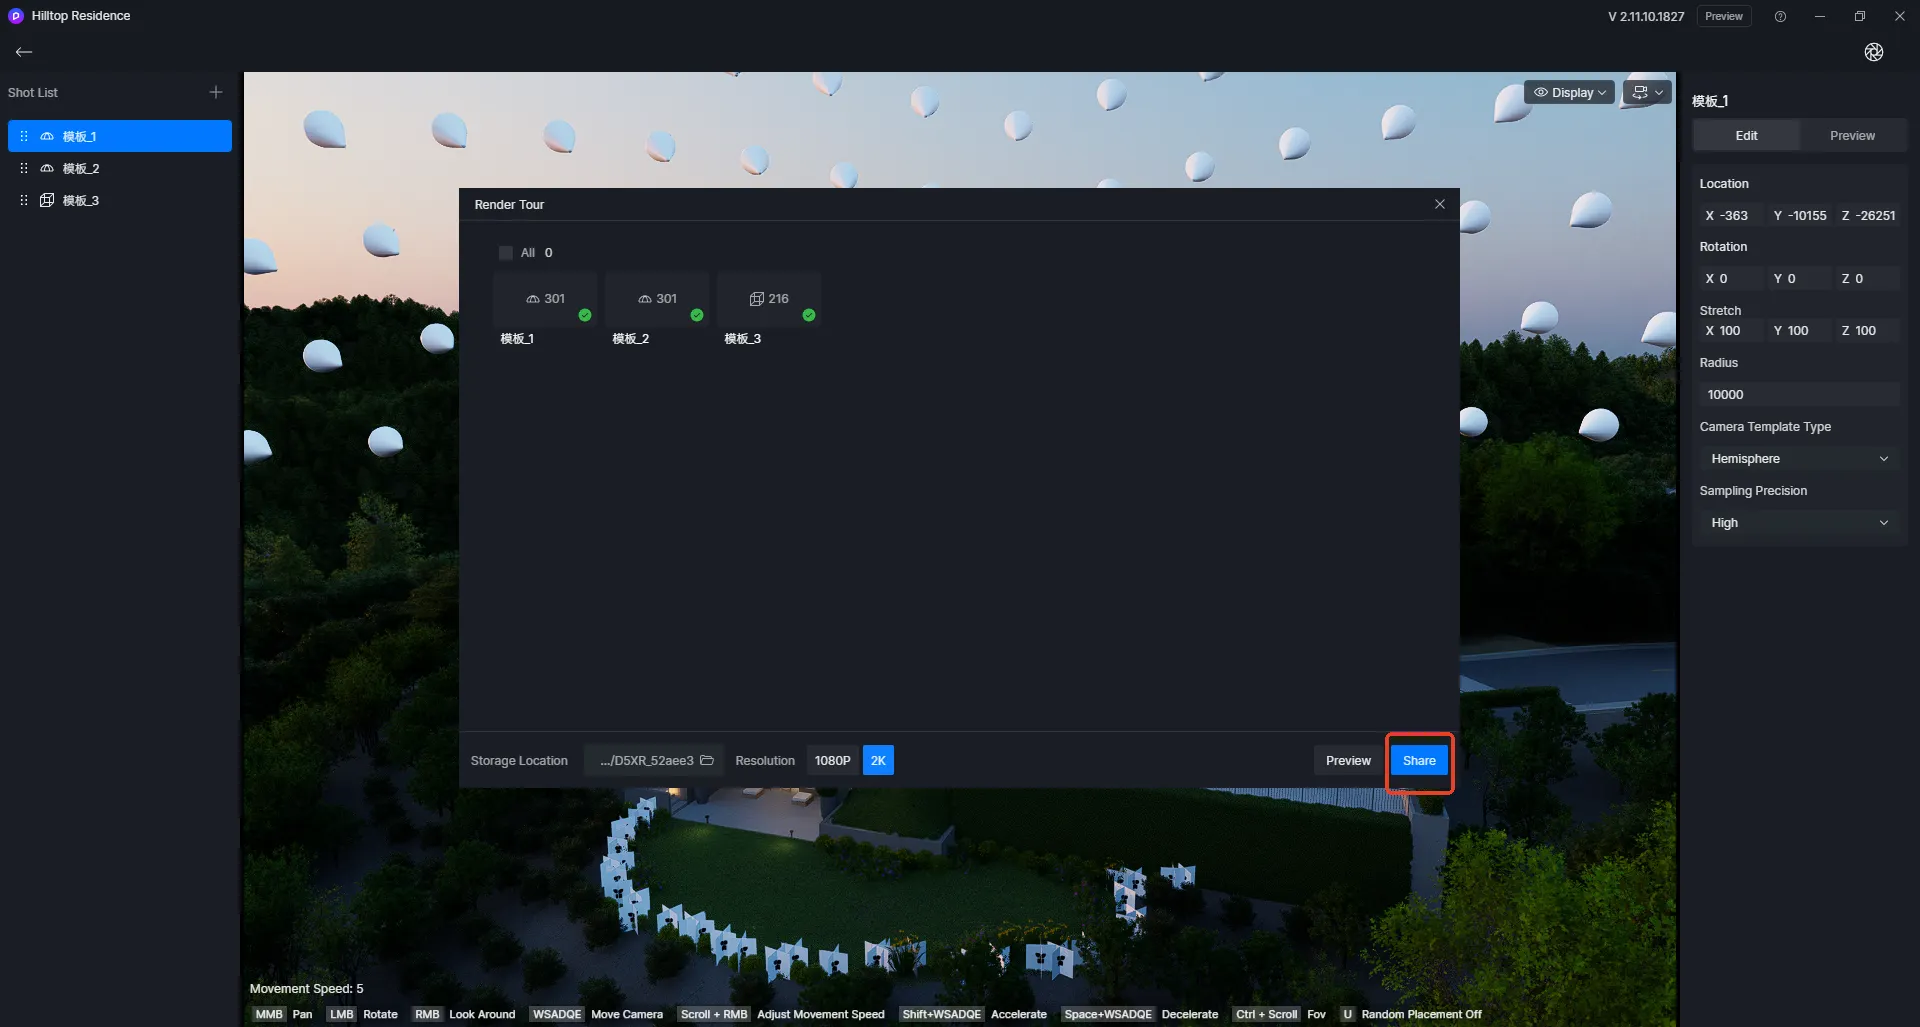
After completing the rendering, open the “Render Tour” window, select “Share”, and you can upload the local image to the cloud-based “Personal Projects”.
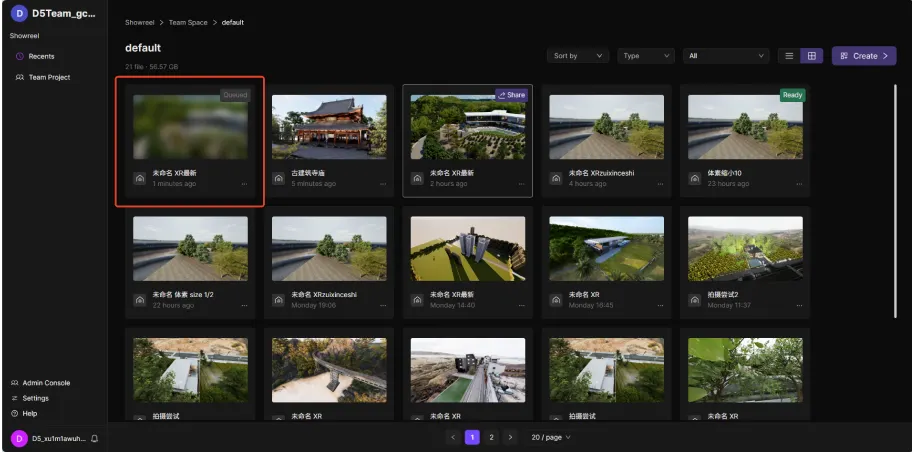
Upon completion of the upload, a task with the status “Queued” will be automatically created in the web backend. Please be patient until the completion of training.
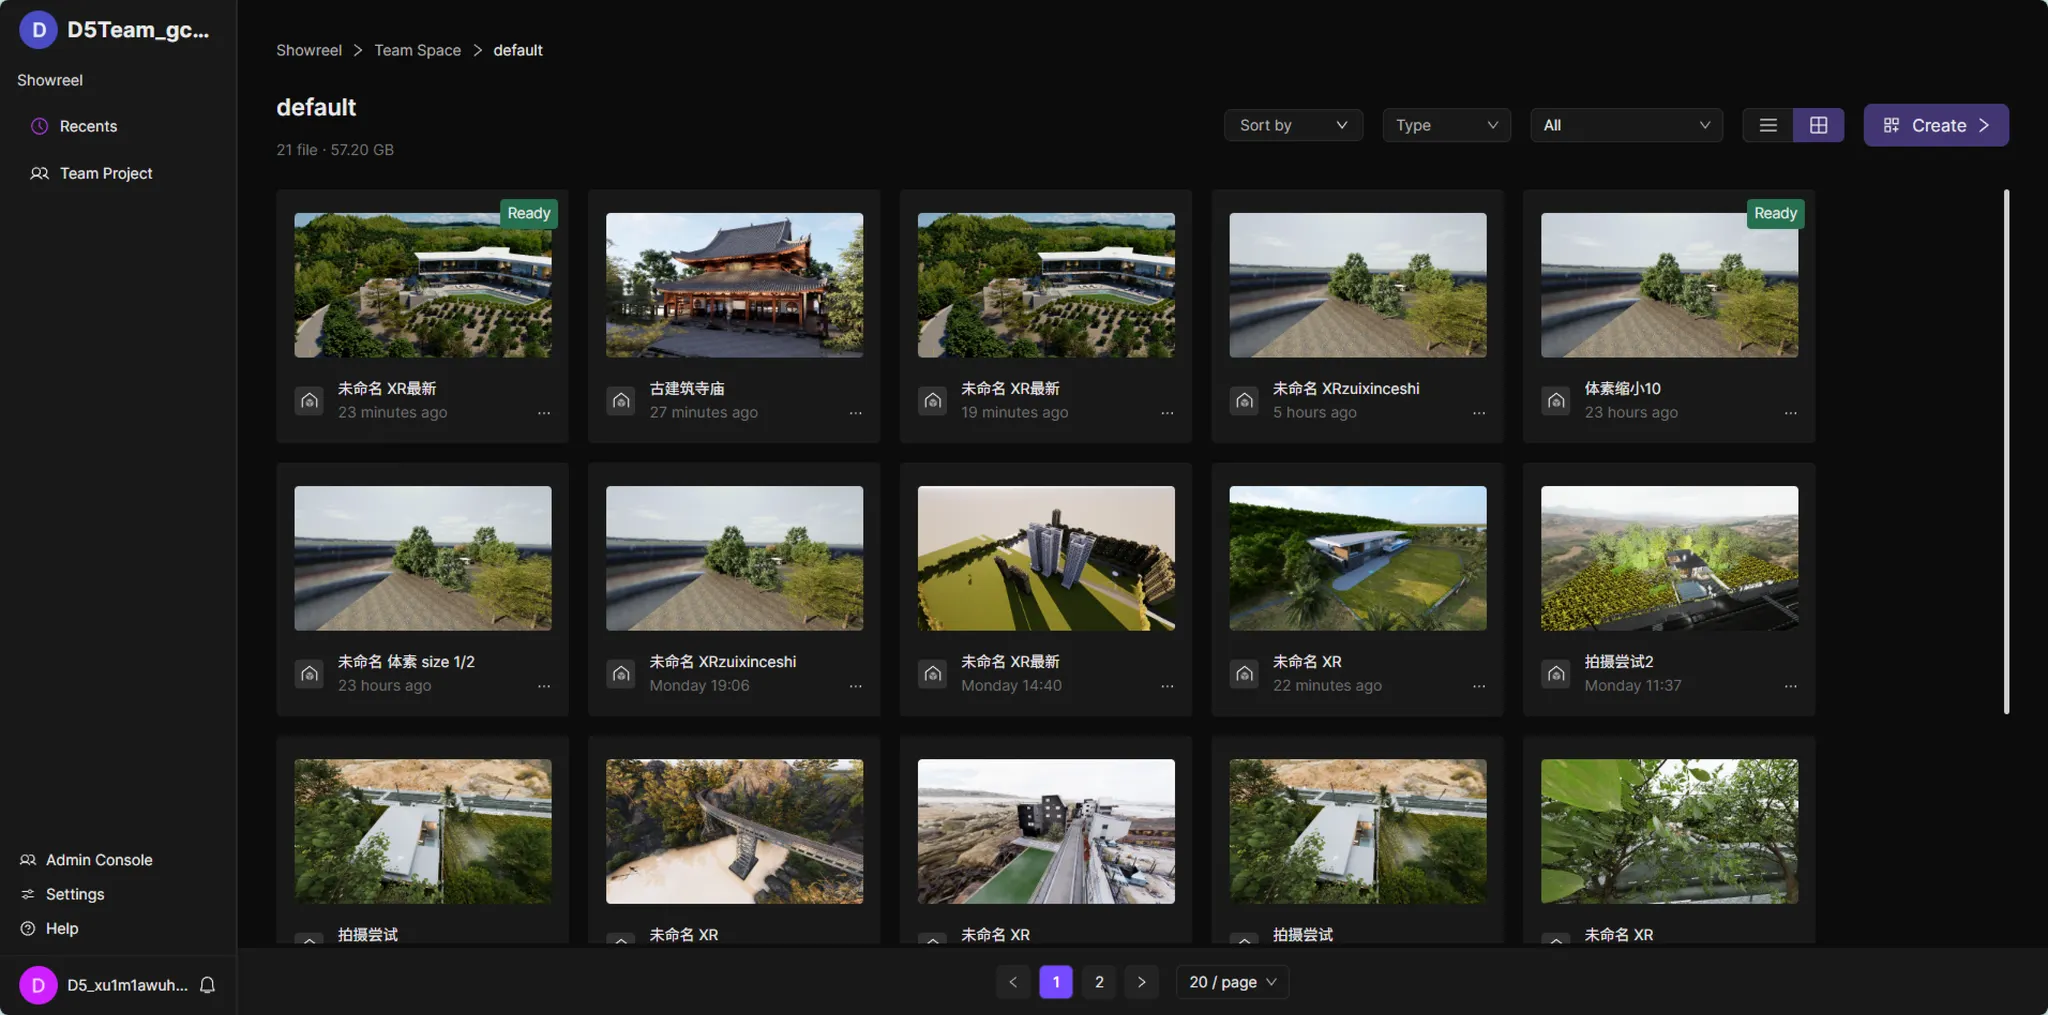
Upon completion of training, the status will update automatically (with users notified via email). Users may then click “Edit” to access the online editor, review the training results, and share the link.
Edit & Publish Share
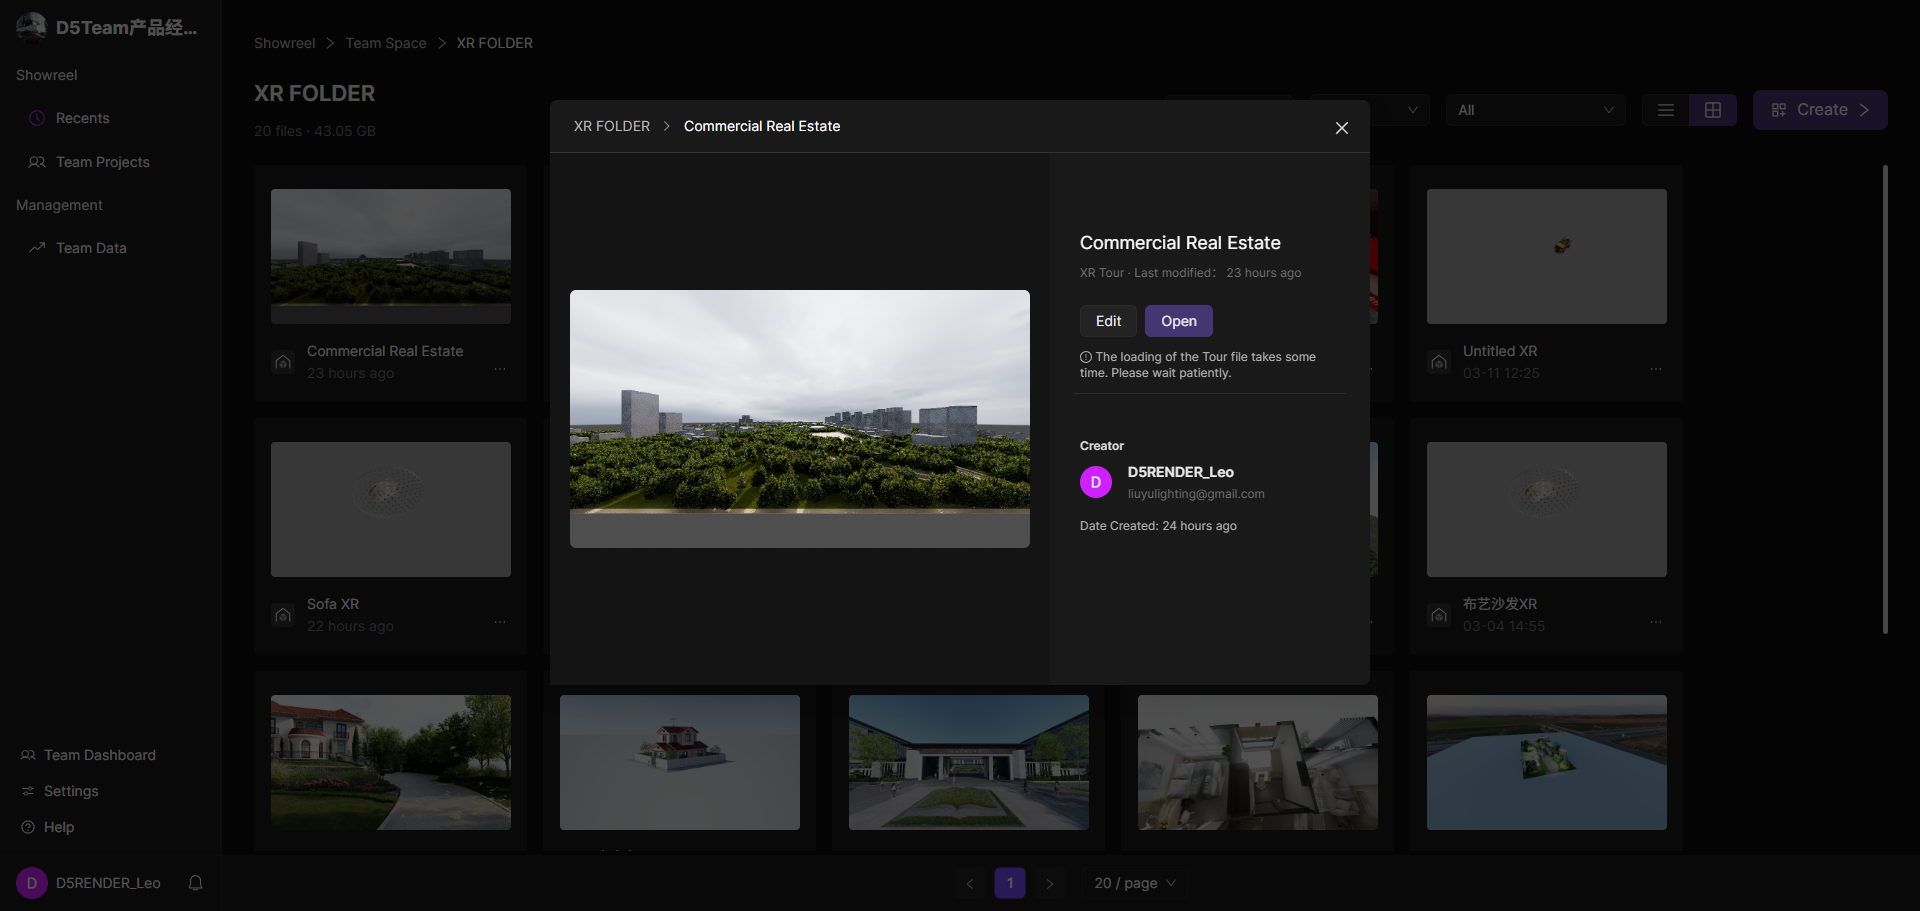
Upon completion of training, click Edit to access the online editor.
The online interactive editor supports adding hotspots (web or media content), allowing users to add further details to their 3D projects. Media Hotspots support video (iframe), images (up to 20 photos, 100MB each), hyperlinks, and text. Web Hotspots support URLs and iframe links.
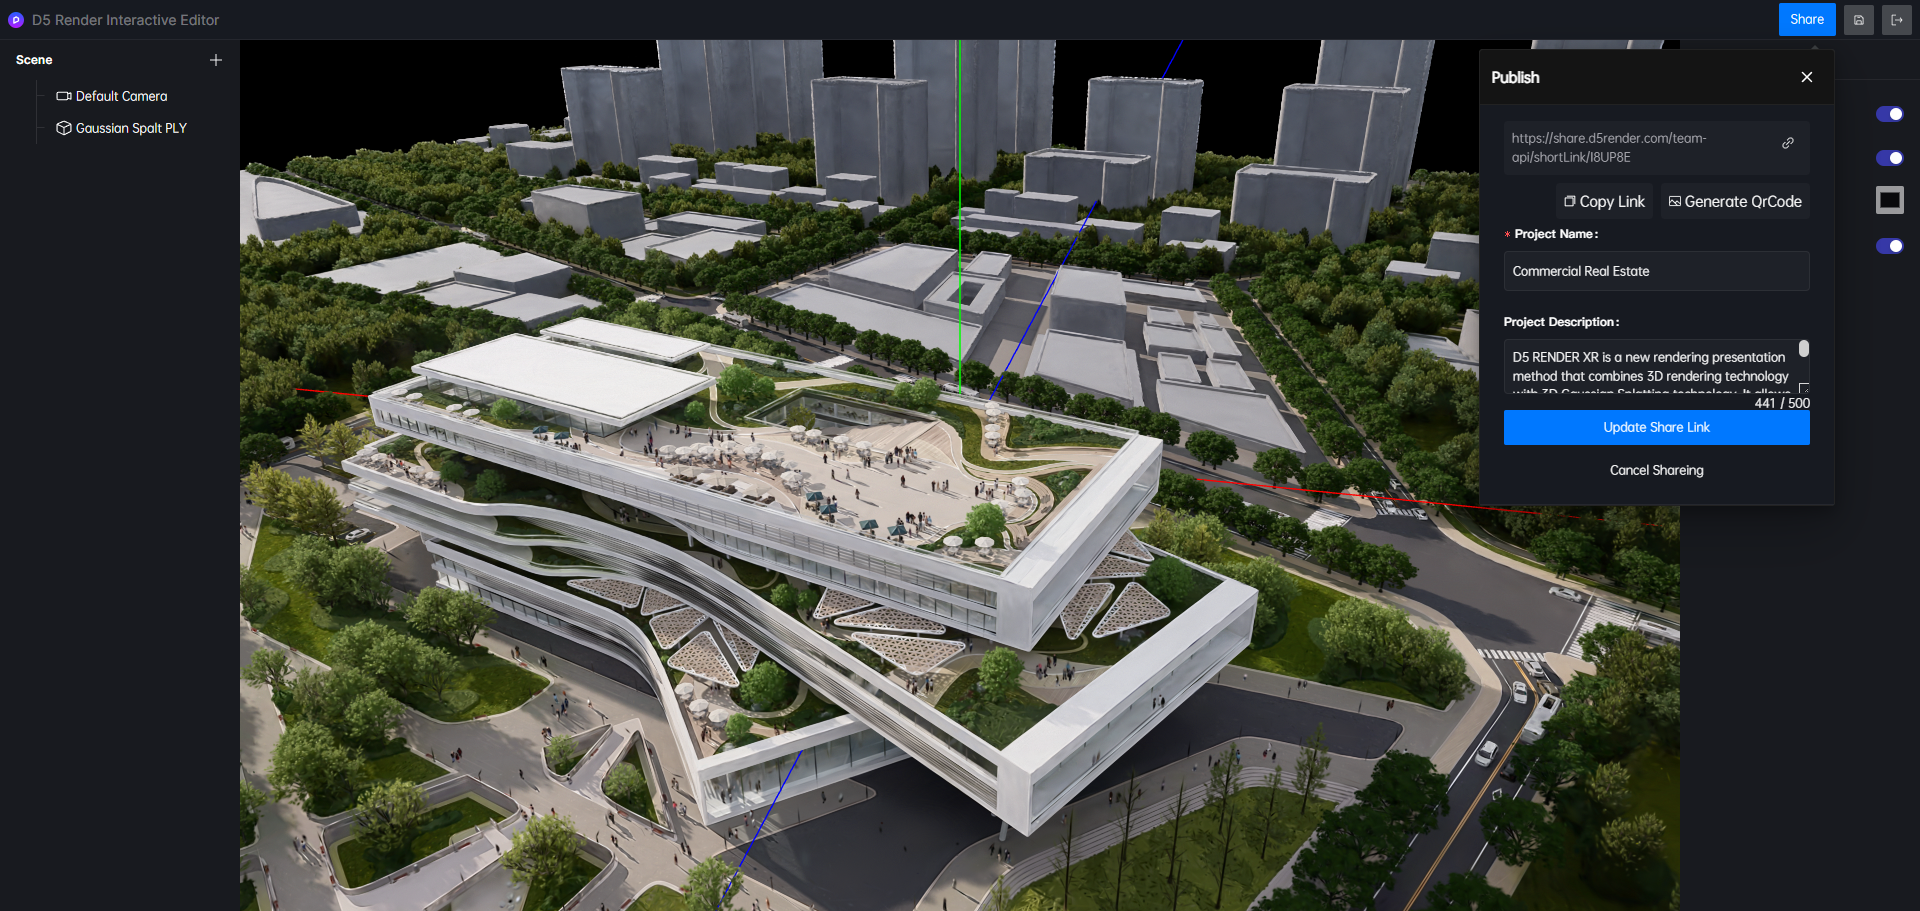
Upon completing all edits, click ‘Share’ to generate a shareable link for online display of your 3D project. You may communicate with team members or external collaborators via comments.
Interactive XR Demos
Experience real-time 3D environments across different categories. Select a project to launch the immersive viewer.
D5 XR Open Workflow
Extend the possibilities of your 3D projects by integrating D5 XR with leading platforms and AI technologies.
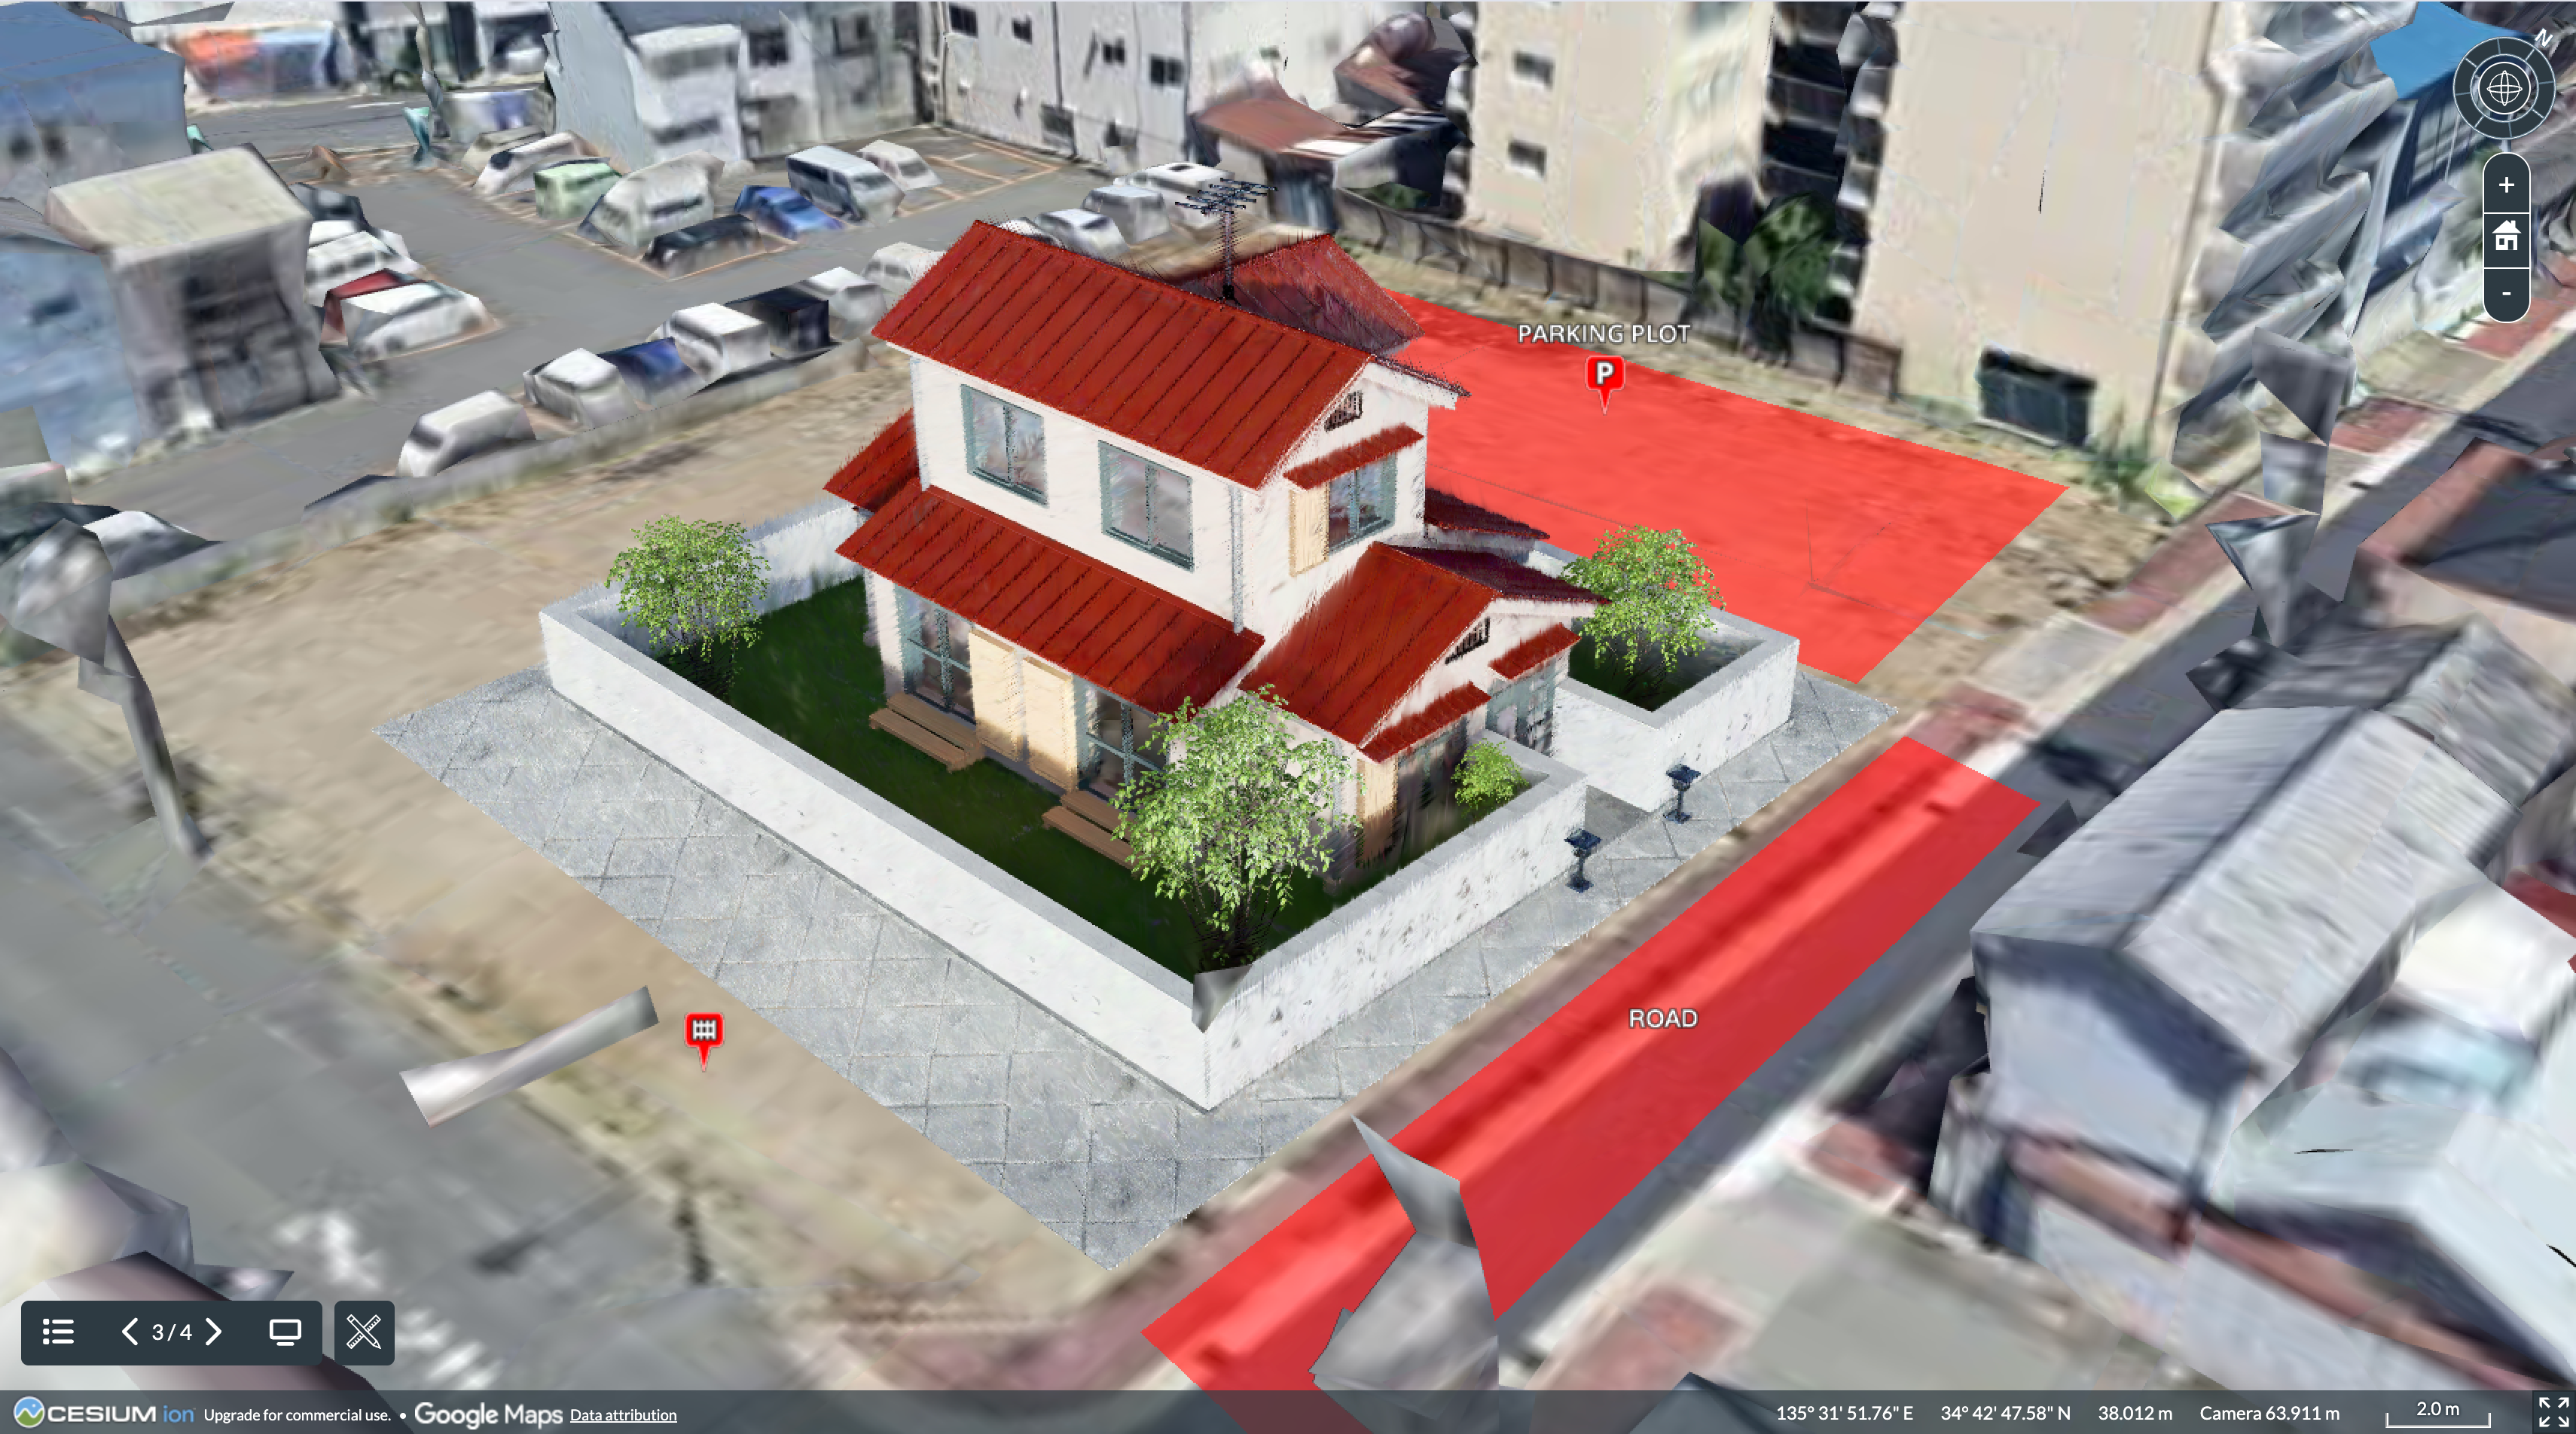
Cesium & D5 XR
Integrate high-precision D5 XR models into the Cesium platform for large-scale geographic storytelling and interactive digital twin presentations across real-world locations.
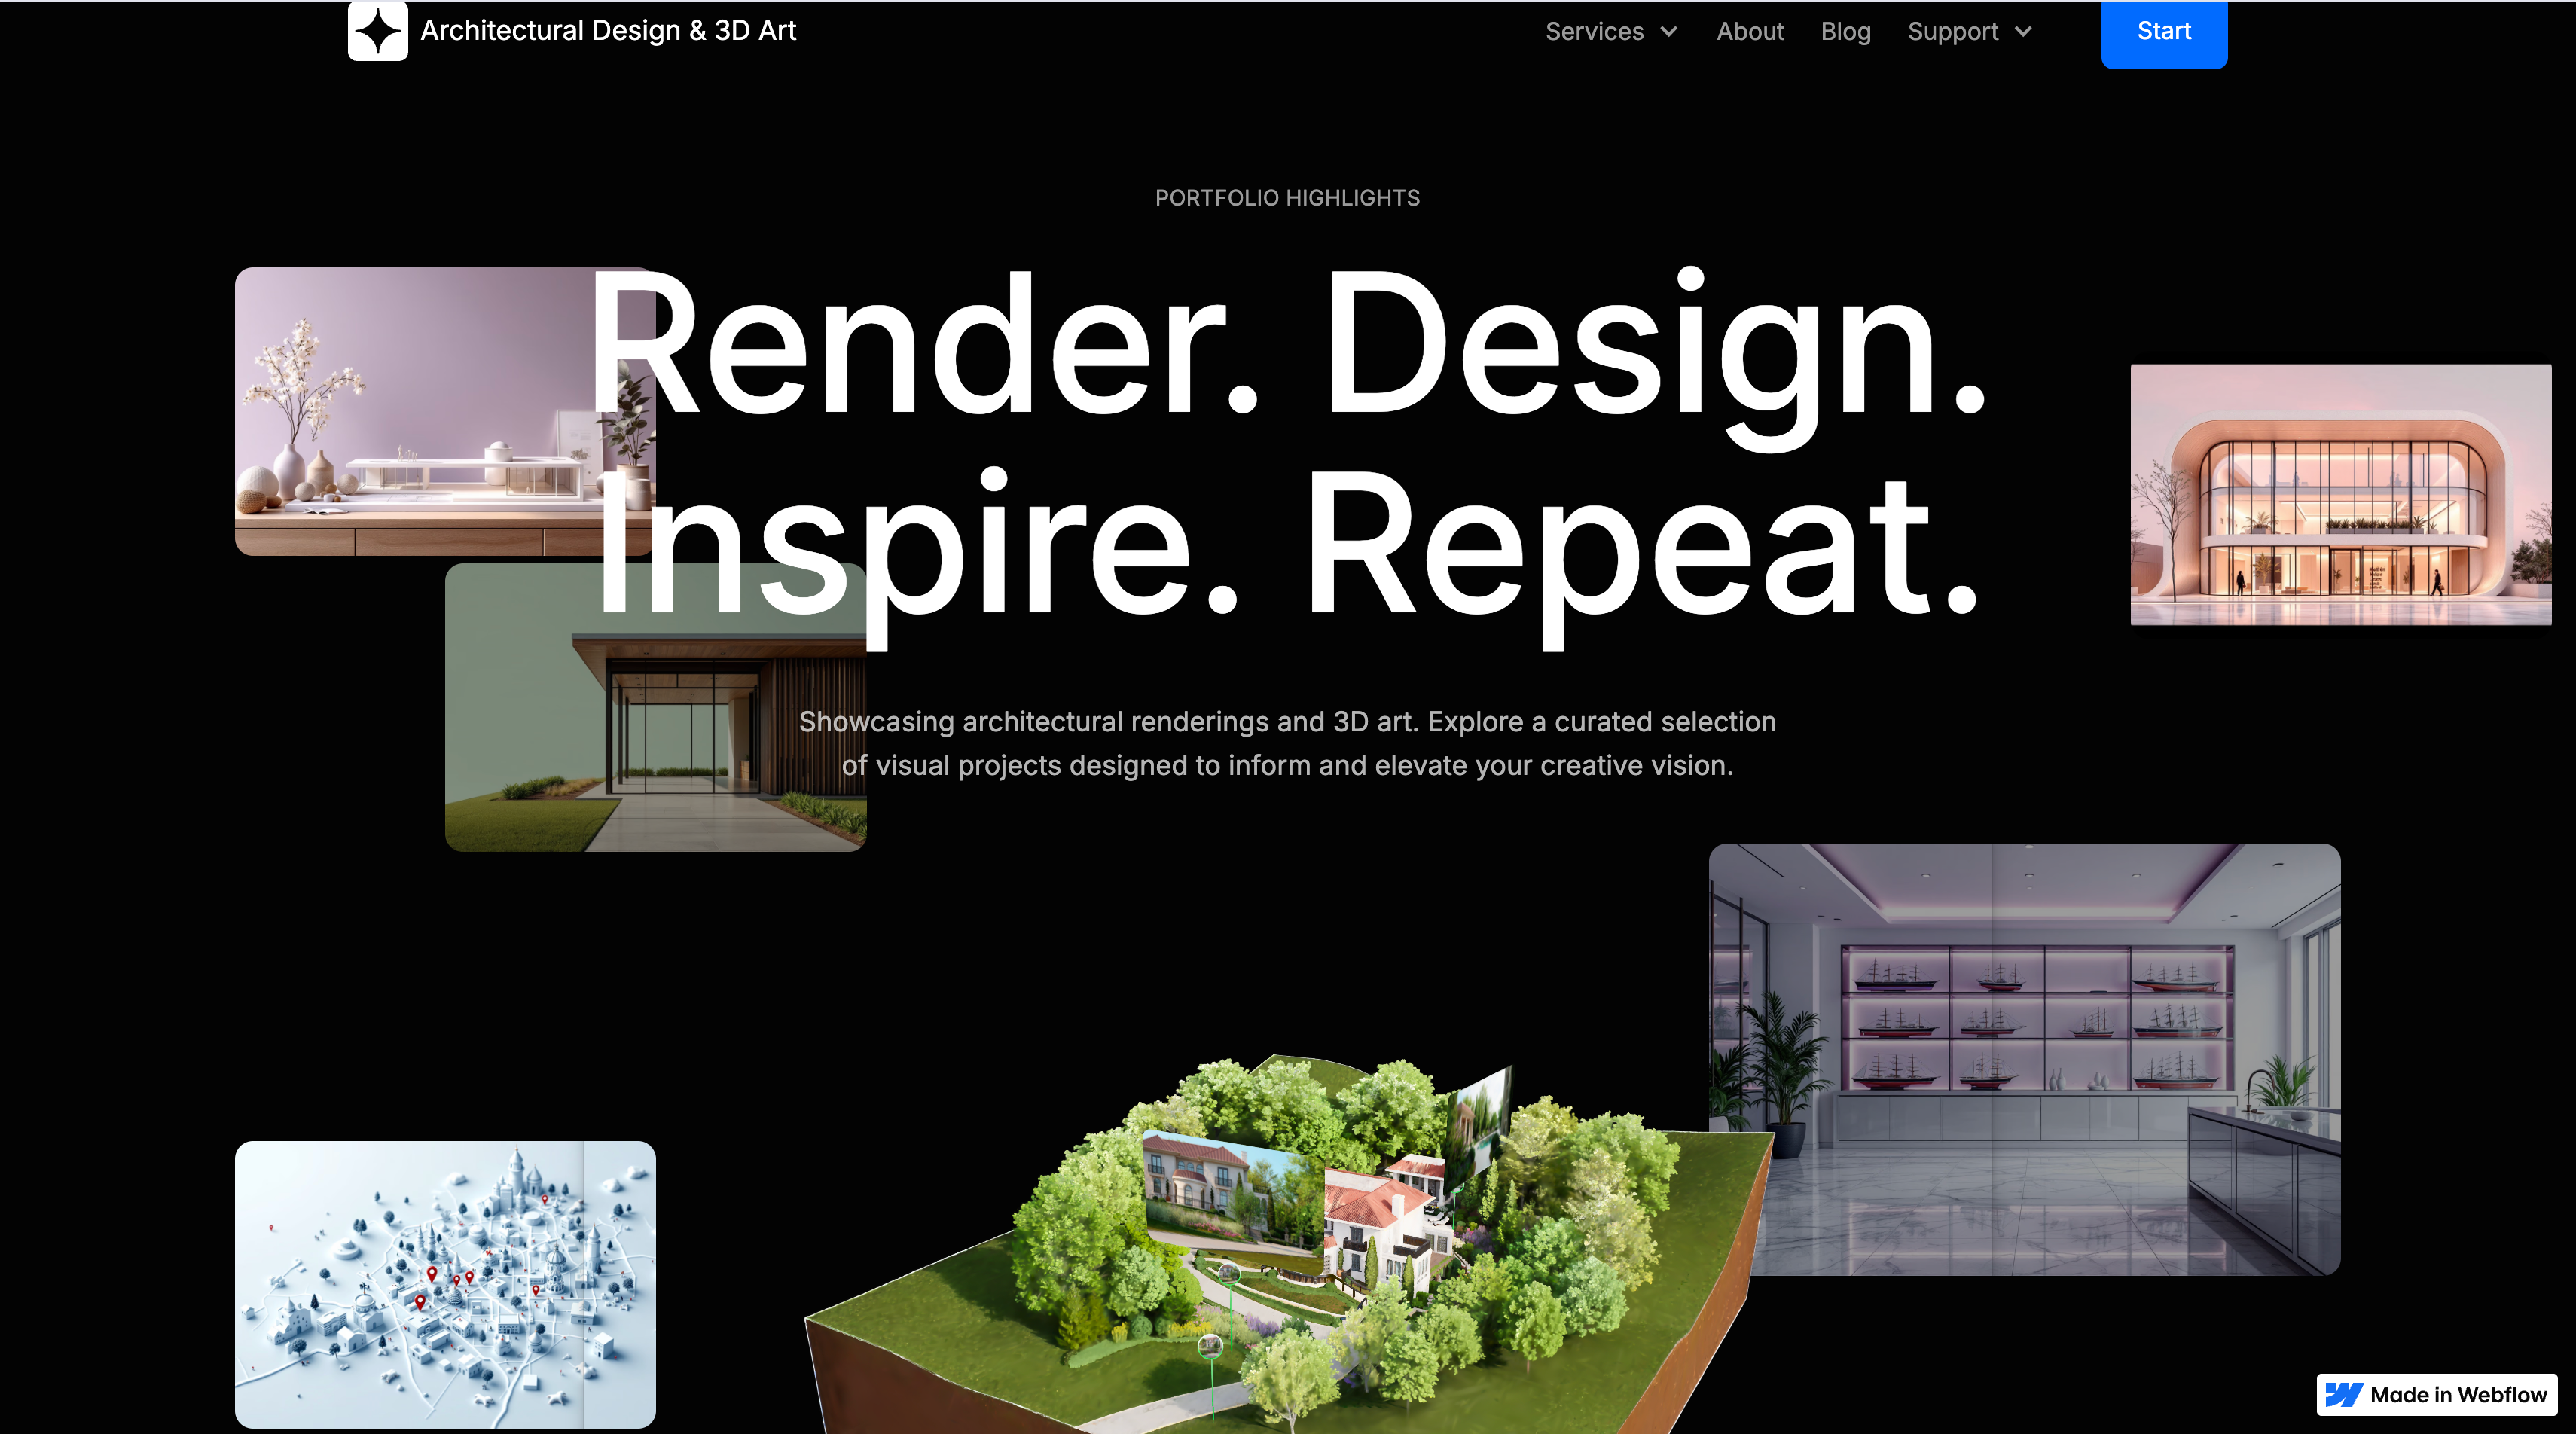
Spline & D5 XR & Webflow
Bring your XR projects to life with Spline's advanced 3D interactivity. Export and embed seamless 3D experiences directly into Webflow websites without any coding.
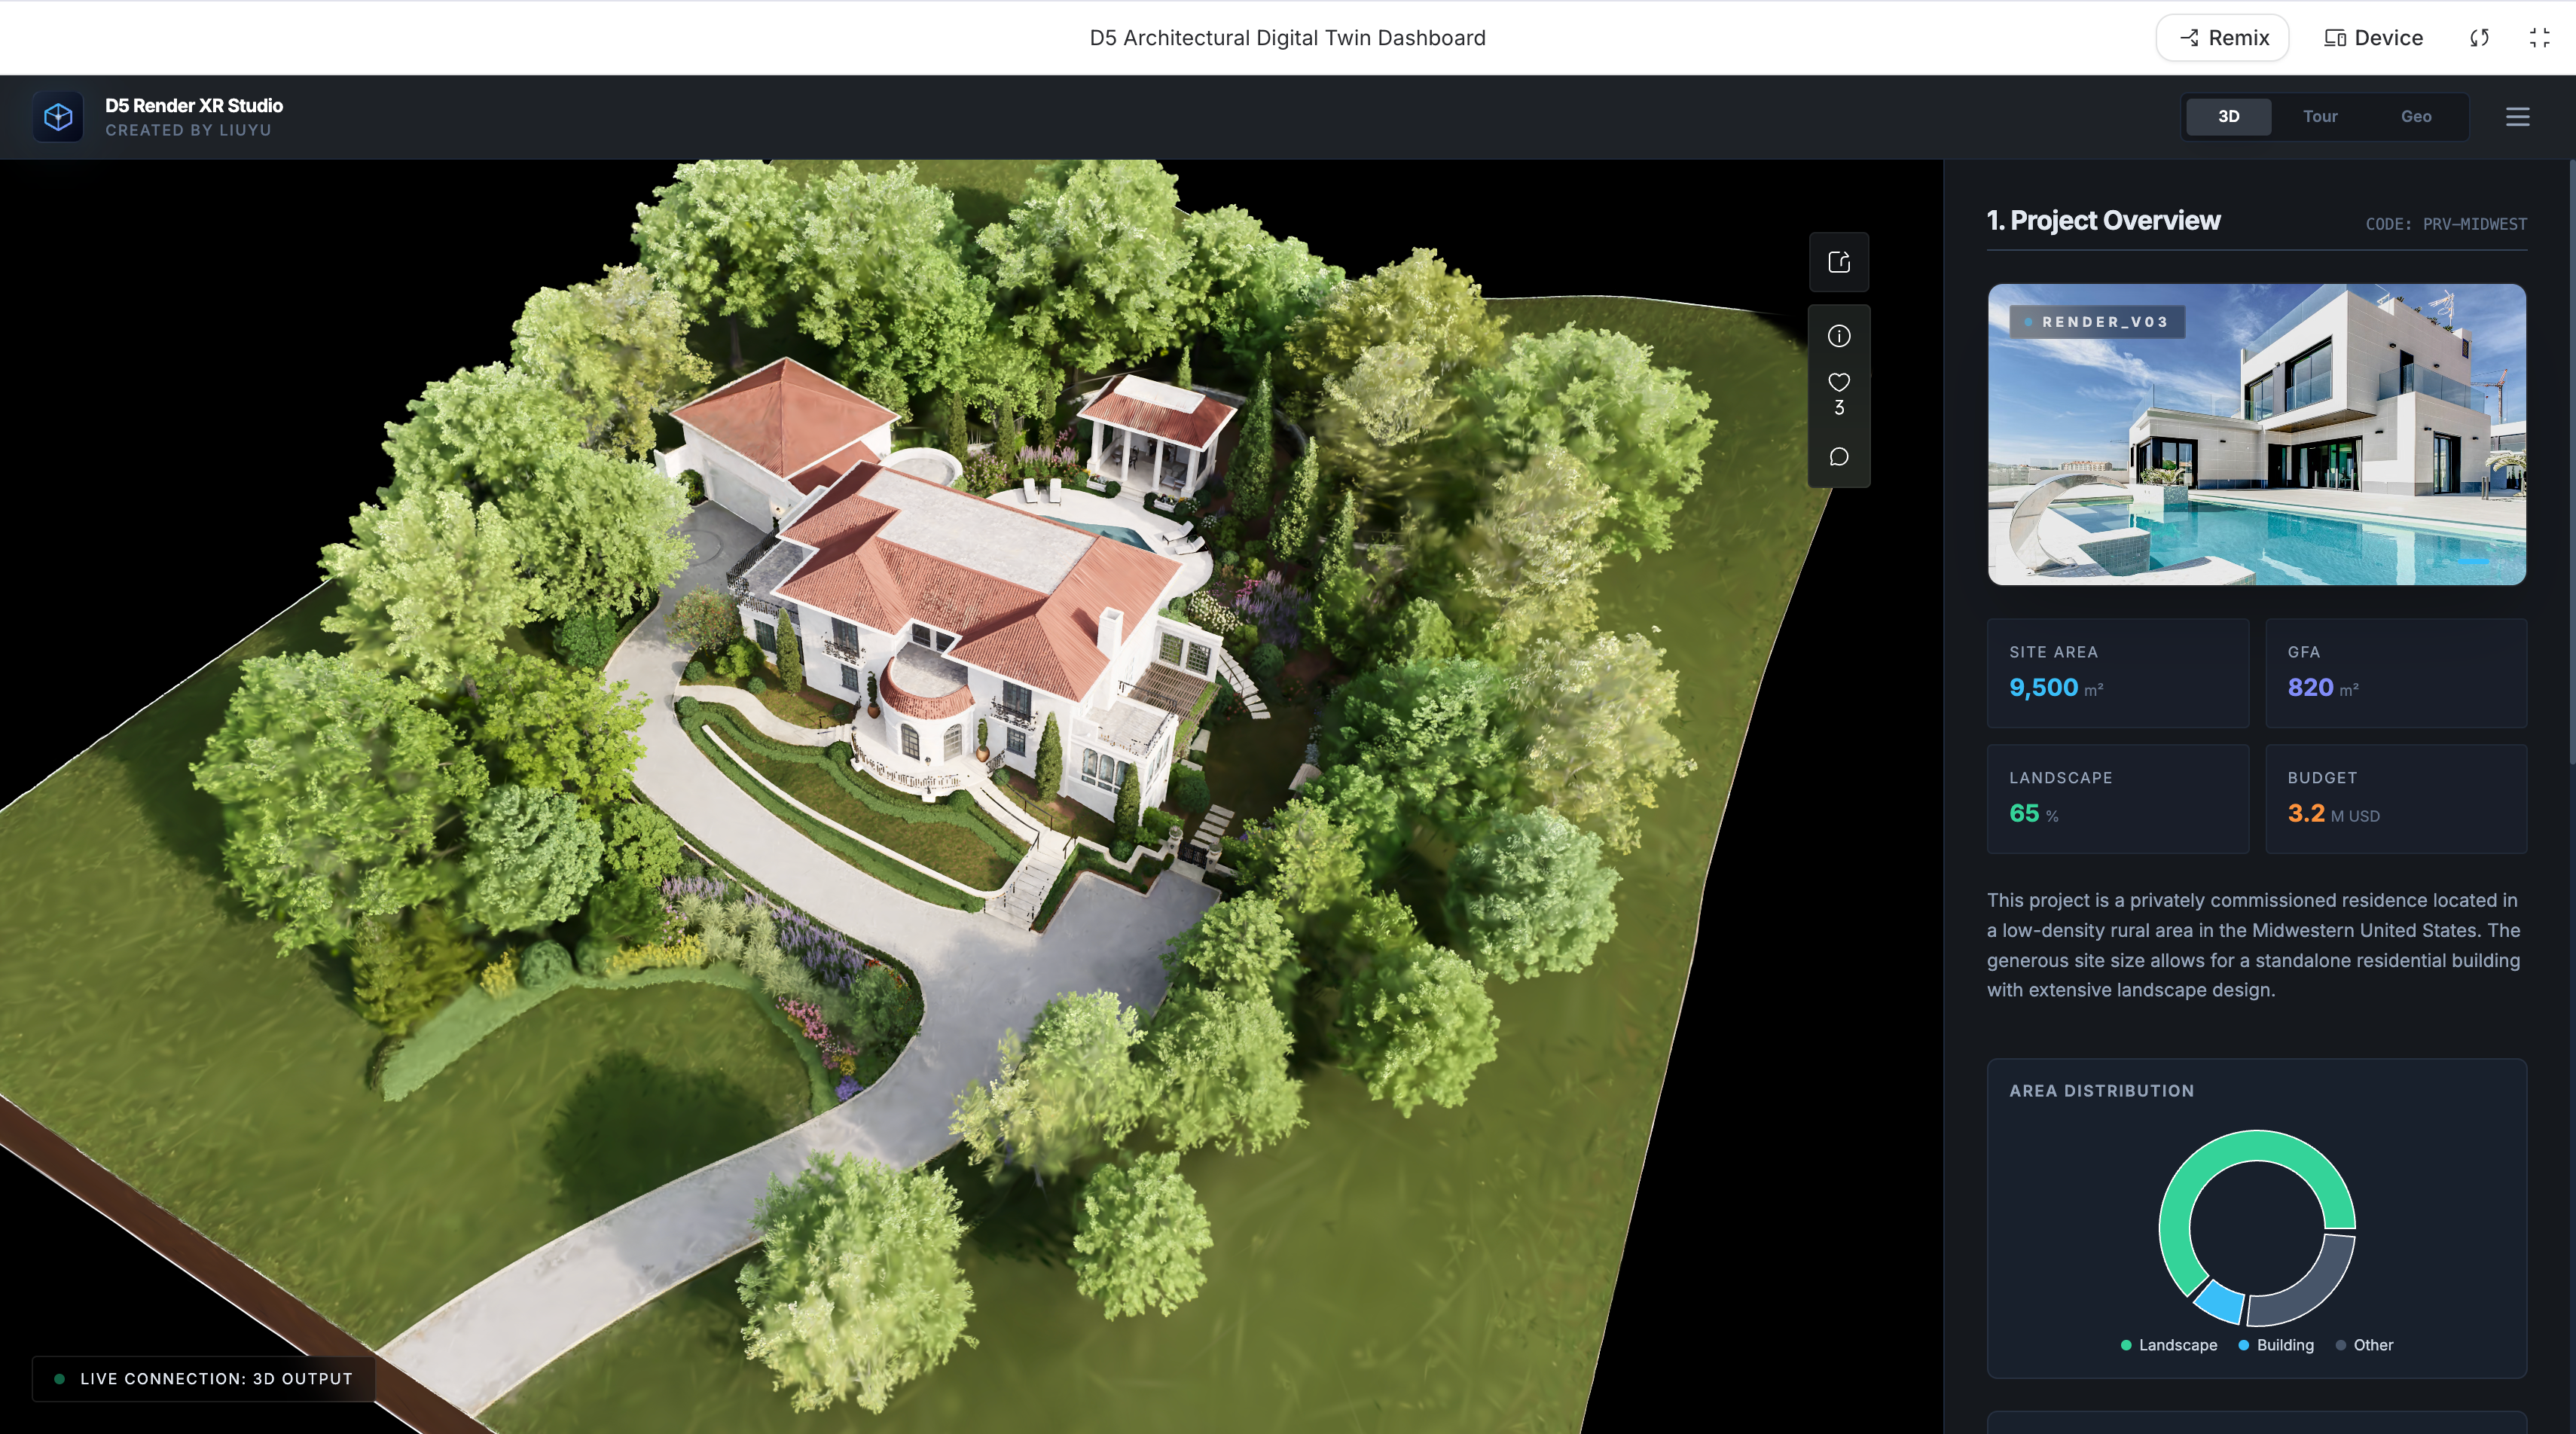
Gemini & D5 XR
Leverage Google AI Studio and Gemini to create intelligent 3D digital twin dashboards. Build custom applications that respond to data and AI-driven insights.